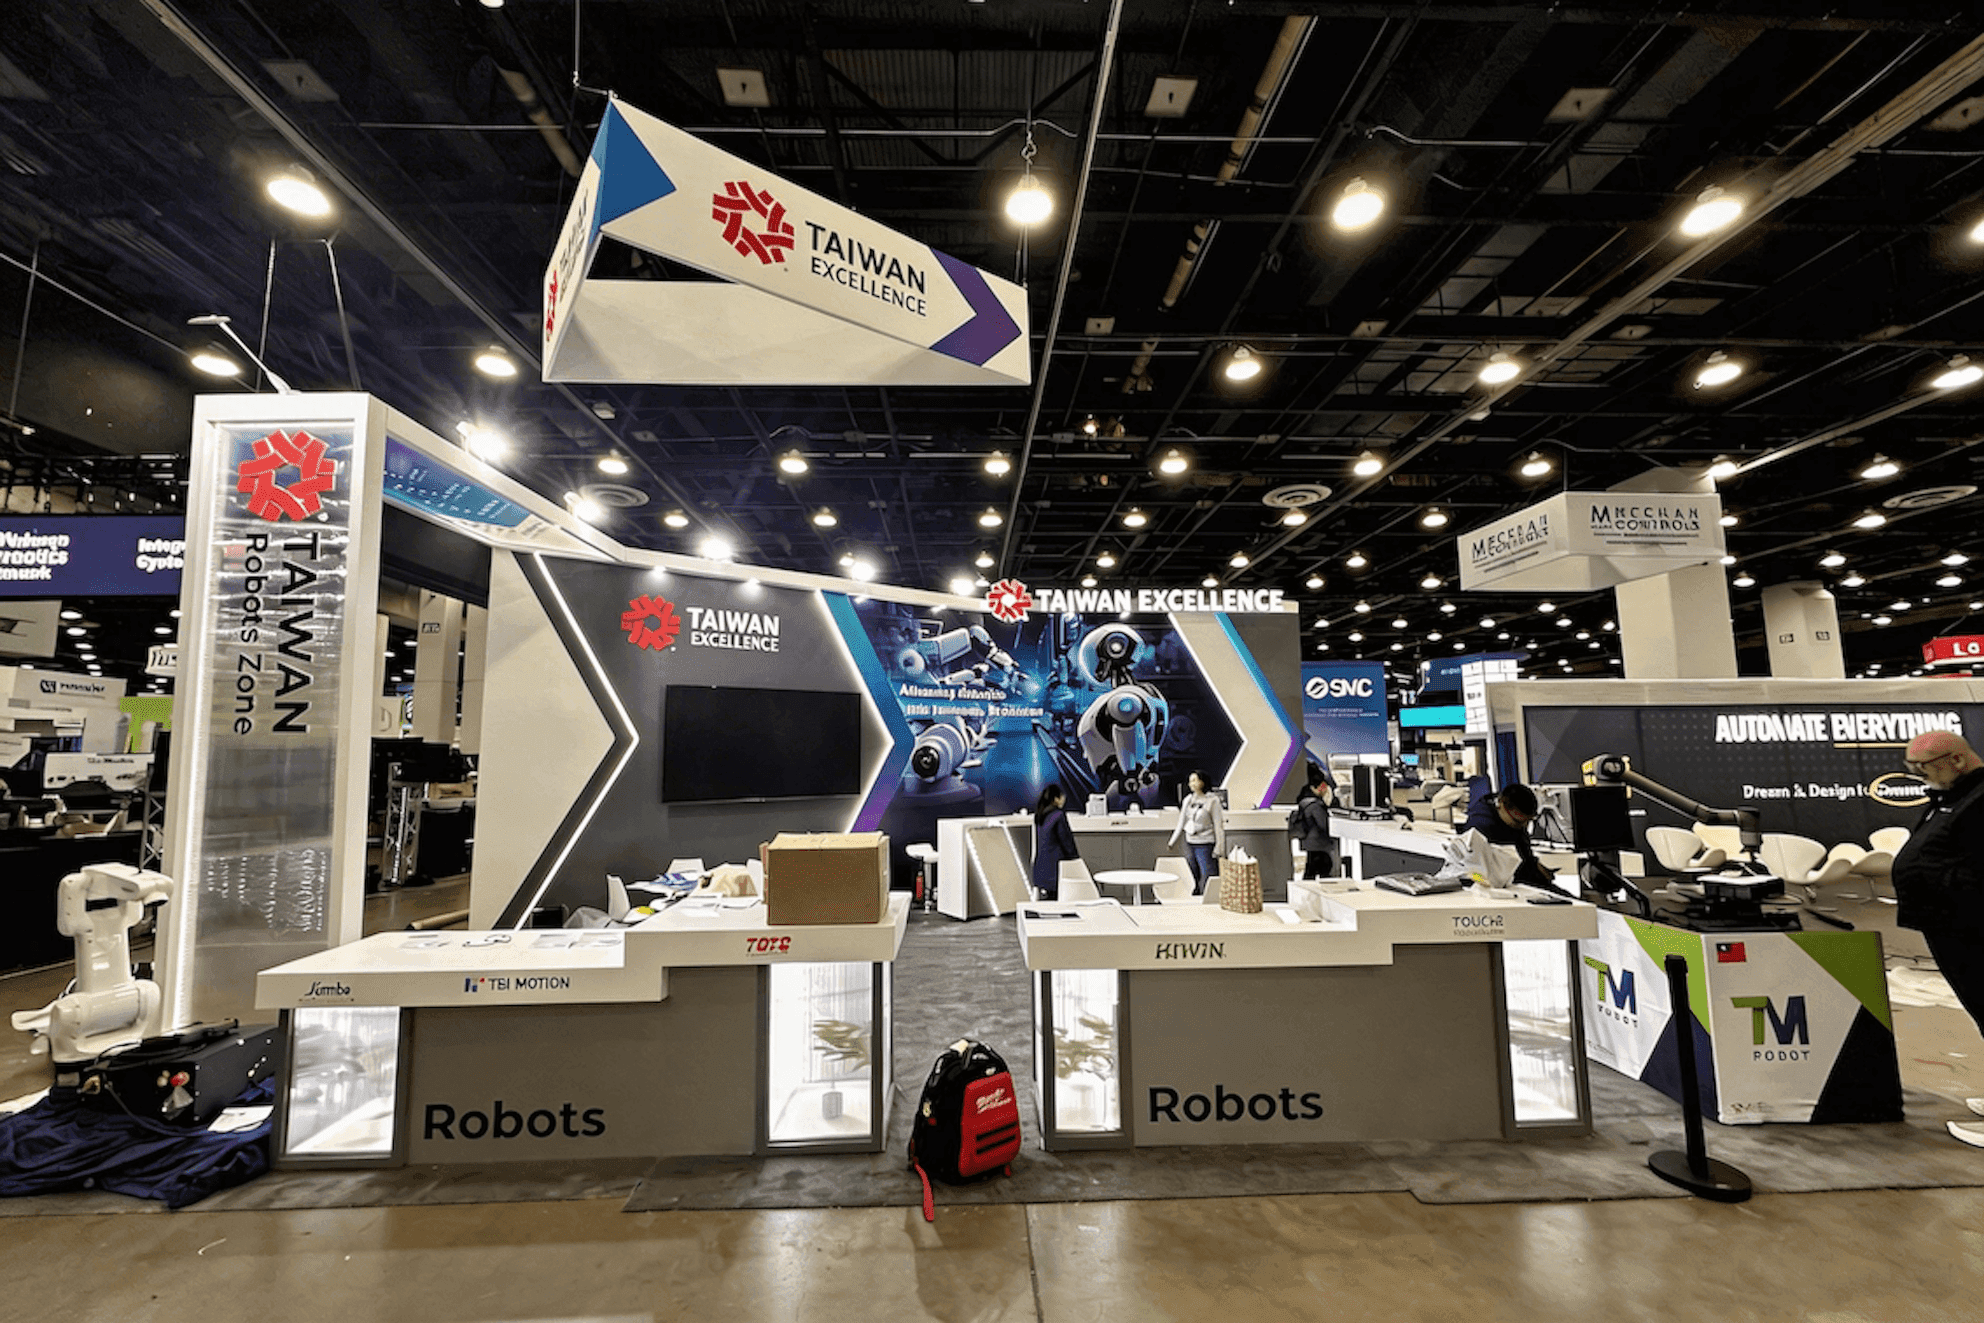
Start With One Clear Product Action
Before selecting counters, screens, or demo stations, define what the visitor should actually do.
Ask:
What should the visitor watch, touch, test, or operate?
What result should be visible at the end?
Does the product require staff guidance?
Can several visitors participate at once?
How quickly can the station be reset?
What should happen after the demonstration?
A robotics company may need to show a programmed movement cycle. A SaaS exhibitor may want a visitor to complete a short workflow. An equipment manufacturer may need to demonstrate controls, movement, or physical output.
Each action creates different requirements for operator clearance, viewing distance, sound, product security, power, storage, and audience capacity.
When several products are displayed, avoid giving every item the same visual priority. One primary demonstration should explain the main reason to stop. Secondary products can support that message without competing with it.
Choose the Right Product Demo Format
Demo Format | Best Fit | What Visitors Do | Main Planning Focus |
|---|---|---|---|
Presenter-Led Hero Demo | Product launches, scheduled presentations, and products that need explanation | Watch one staff-led demonstration as a small group | Audience position, aisle visibility, sound, presenter clearance, and crowd control |
Hands-On Product Station | Devices, tools, controls, samples, and physical products | Test or operate the product with brief staff guidance | Participant space, product security, reset access, cleaning, and nearby storage |
Software Workflow Station | SaaS, PropTech, cybersecurity, diagnostic systems, and enterprise software | Complete a workflow while nearby visitors follow the result on another screen | Screen visibility, glare, user position, cable access, and observer sightlines |
Staff-Led Equipment Demo | Machinery, moving products, technical equipment, and controlled live tests | Watch trained staff operate the product from a defined viewing position | Operator clearance, visitor separation, power, floor access, sound, and installation sequence |
Technical Deep-Dive Station | Complex products that require longer explanation or scheduled sessions | Review detailed features, data, or workflows with a specialist | Session length, AV support, privacy, and separation from faster demonstrations |
The right format depends on the product action, the length of the interaction, and how much operating space staff and visitors need.
A booth may combine several formats, but each station should have a distinct purpose. A technical deep-dive station, for example, should not occupy the same space needed for a fast public demonstration.
Plan the Space People Actually Use
A demo station may appear compact in a drawing but become difficult to operate as soon as staff and visitors are added.
The full working footprint may include:
The product or interactive screen
The operator
The active participant
Visitors watching
People waiting
Staff circulation
Product reset activity
Power and cable access
Backup equipment
Nearby storage
A route to the next interaction
Keep the Booth Entry Clear
Visitors should be able to understand the demonstration before entering the booth. A visible product action, short message, screen, or sample can explain what is happening from the aisle.
The active station should sit far enough inside the booth that the presenter and audience do not gather across the entrance.
Separate Participation From Viewing
The person using the product and the people watching it may need different positions.
For a software demo, the participant may face an interactive screen while observers follow the workflow on a larger display. For a physical product, viewers may need to stand beside the participant rather than directly behind them.
Planning these positions early prevents people from blocking the product or each other.
Plan the Next Step
After the demonstration, visitors should be able to move naturally toward:
A short conversation area
A technical specialist
A badge-scanning point
A scheduled meeting
Another related product station
Lead capture should follow the product interaction rather than interrupt it.
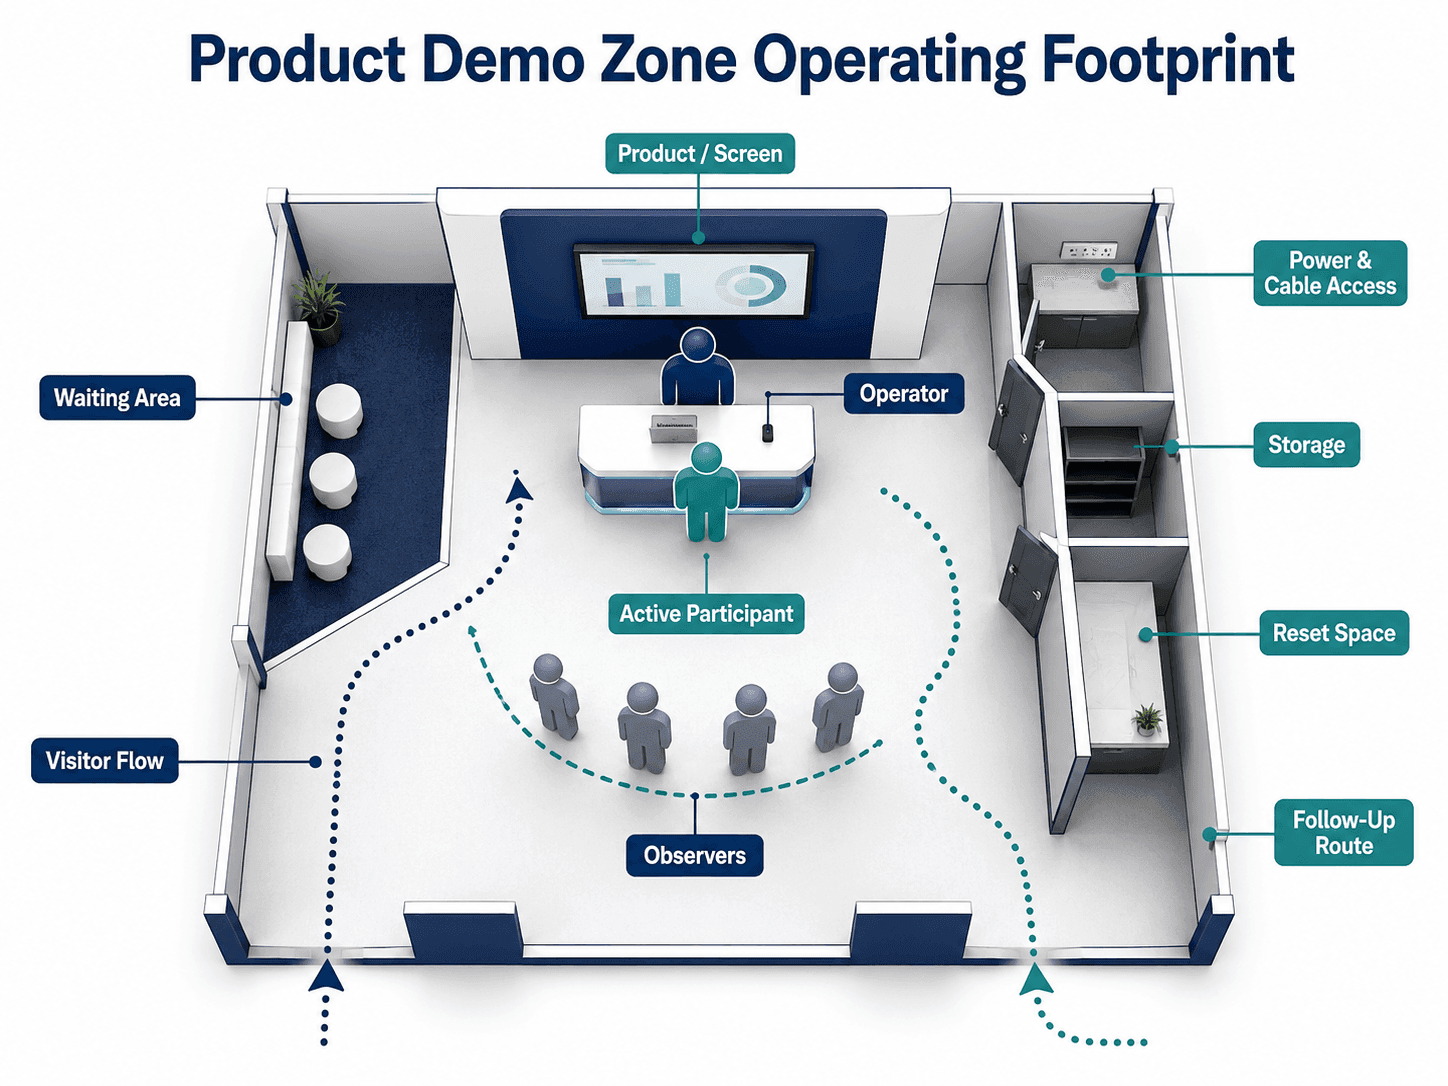
A product demo zone must account for the full working footprint, not only the product, counter, or screen.
Operator Side vs. Visitor Side
Operator Side
The operator side needs access to product controls, cables, replacement parts, reset tools, and backup equipment.
Staff should be able to restart or adjust the demonstration without crossing the visitor path, moving through a viewing group, or blocking the product.
Visitor Side
The visitor side needs a clear view of the product result, an obvious interaction point, enough space for observers, and a direct route to the next conversation.
Visitors should understand where to stand and what to do without requiring repeated instructions from staff.
A station can look visually balanced while still failing operationally if only one of these sides is planned.
Adjust the Demo Zone to the Booth Size
10×20 Booth
A 10×20 booth normally works best with one main demonstration.
A screen-led station, product counter, or compact hands-on area can sit along the back or side wall while the front remains open. Trying to combine multiple unrelated products, storage, and a full meeting area often makes the booth difficult to understand.
20×20 Booth
A 20×20 booth layout planning approach can support one main demonstration with a separate follow-up area, or two smaller stations serving related products.
Because the booth may be open on several sides, station direction matters. Visitors should recognize the main action without walking through a technical conversation or blocking another entrance.
For example, a hardware exhibitor might place one aisle-visible demonstration near the primary opening, with a smaller hands-on station and compact follow-up counter positioned farther inside.
20×30 Booth
A 20×30 booth layout planning approach gives exhibitors more room to separate attraction, participation, technical discussion, and storage.
A practical layout may include:
One short public demonstration
Two related hands-on or software stations
A deeper technical workflow area
A meeting or consultation space
Integrated storage and AV control
The additional space should create a clearer visitor journey. Filling it with more counters does not automatically improve the demonstration.
30×30 and Larger Booths
Larger booths can support several product categories, scheduled presentations, equipment displays, and multiple meeting areas.
The main risk is fragmentation. Demo zones should be grouped by product application, audience, or workflow so visitors understand where to begin and how the products relate.

This 20×30 technology booth separates the public demonstration, hands-on software stations, technical discussion area, storage, and follow-up path.
Coordinate Screens, Power, AV, and Storage
The demo layout cannot be separated from its technical requirements.
Graphics and Instructions
Graphics should explain the product action or result.
Useful messaging may identify:
What the product does
Who it is designed for
What visitors can test
Whether the station is interactive
Where deeper information is available
Long technical descriptions are less useful when visitors are still deciding whether to stop.
Screen Placement
A screen should support the demonstration rather than function as a disconnected video wall.
Check:
Viewing height
Overhead lighting and glare
Reflections from the aisle
Presenter sightlines
Cable access
Whether the active user blocks the display
These issues are easier to correct in the layout than after the booth has been installed.
Power and Data
Confirm power and data requirements before fixing station locations.
The plan may need to include power drops, charging points, network connections, cable routes, floor access, adapters, backup devices, and offline demo content.
Cables should not cross visitor circulation or interfere with the staff operating area.
Storage and Reset Space
Demo stations often need replacement parts, samples, chargers, cleaning materials, packaging, or backup hardware.
These items should be close enough for staff to reach quickly but hidden from visitor view. A counter or compact storage room can support faster resets and keep the station presentable throughout the show.
Example Scenario: A 20×30 Technology Demo Booth
Consider a 20×30 technology exhibit being developed as part of CES booth planning.
A short public demonstration sits slightly inside the main opening. Visitors can understand the product result from the aisle, while the presenter and viewing group remain inside the booth.
Two software workstations run along one side. Each includes an interactive screen for the user and a larger display for nearby observers.
The rear area is reserved for longer technical discussions. Storage behind the workstations holds backup devices, chargers, packaging, and staff belongings.
The visitor path is simple:
See the main demonstration.
Try the product at a workstation.
Ask a technical or sales question.
Continue to a meeting or leave without crossing incoming traffic.
The layout does not depend on adding as many features as possible. Its value comes from the relationship between attraction, participation, and follow-up.
Common Product Demo Zone Planning Mistakes
Measuring Only the Product Footprint
A product may fit on the drawing while leaving no usable space for the operator, participant, observers, or reset process.
The station looks workable during design but becomes congested as soon as the show opens.
Letting Viewers Gather in the Aisle
A demo placed directly on the booth edge may be visible, but the viewing group has nowhere to stand.
This blocks the entrance, creates pressure from aisle traffic, and makes the station harder for staff to manage.
Giving Every Product the Same Priority
When every product receives the same screen size, counter space, and messaging weight, visitors cannot identify the main reason to stop.
Secondary products should support the primary demonstration rather than compete with it.
Confirming Power and AV Too Late
Late technical changes can force revisions to flooring, counters, screen positions, cable routes, graphics, and installation plans.
The problem is not only added work. It can also weaken the intended visitor flow.
Ending Without a Clear Next Step
A successful demonstration can still lose value when visitors do not know where to ask deeper questions, compare another product, or schedule a meeting.
The follow-up route should be part of the layout rather than an afterthought.
Frequently Asked Questions
How much space should a product demo zone use?
There is no single standard footprint. Space should be calculated separately for the product, operator, participant, observers, waiting visitors, staff circulation, storage, and reset activity. A software station usually needs less operating space than a live equipment demonstration.
Should a demo station face the aisle?
The main action should be recognizable from the aisle, but the product, presenter, audience, and waiting area should remain within the booth footprint. Position the station far enough inside to protect the entrance and circulation path.
How should power, AV, and backup content be planned?
Confirm power loads, data requirements, screen locations, cable routes, charging needs, and equipment access before finalizing the layout. Prepare offline content, replacement adapters, backup devices, and a documented reset process before the show.
Plan the Demo Before Finalizing the Booth
A productive demo zone begins with one clear product action and a realistic understanding of how visitors will gather, participate, watch, and move forward.
The product, visitor flow, staffing, AV, power, storage, and follow-up sequence should be planned as one system. The final layout should then be tested from both the visitor and staff perspective.
The goal is straightforward: make the demonstration easy to recognize, easy to operate, and easy to continue into the next conversation.