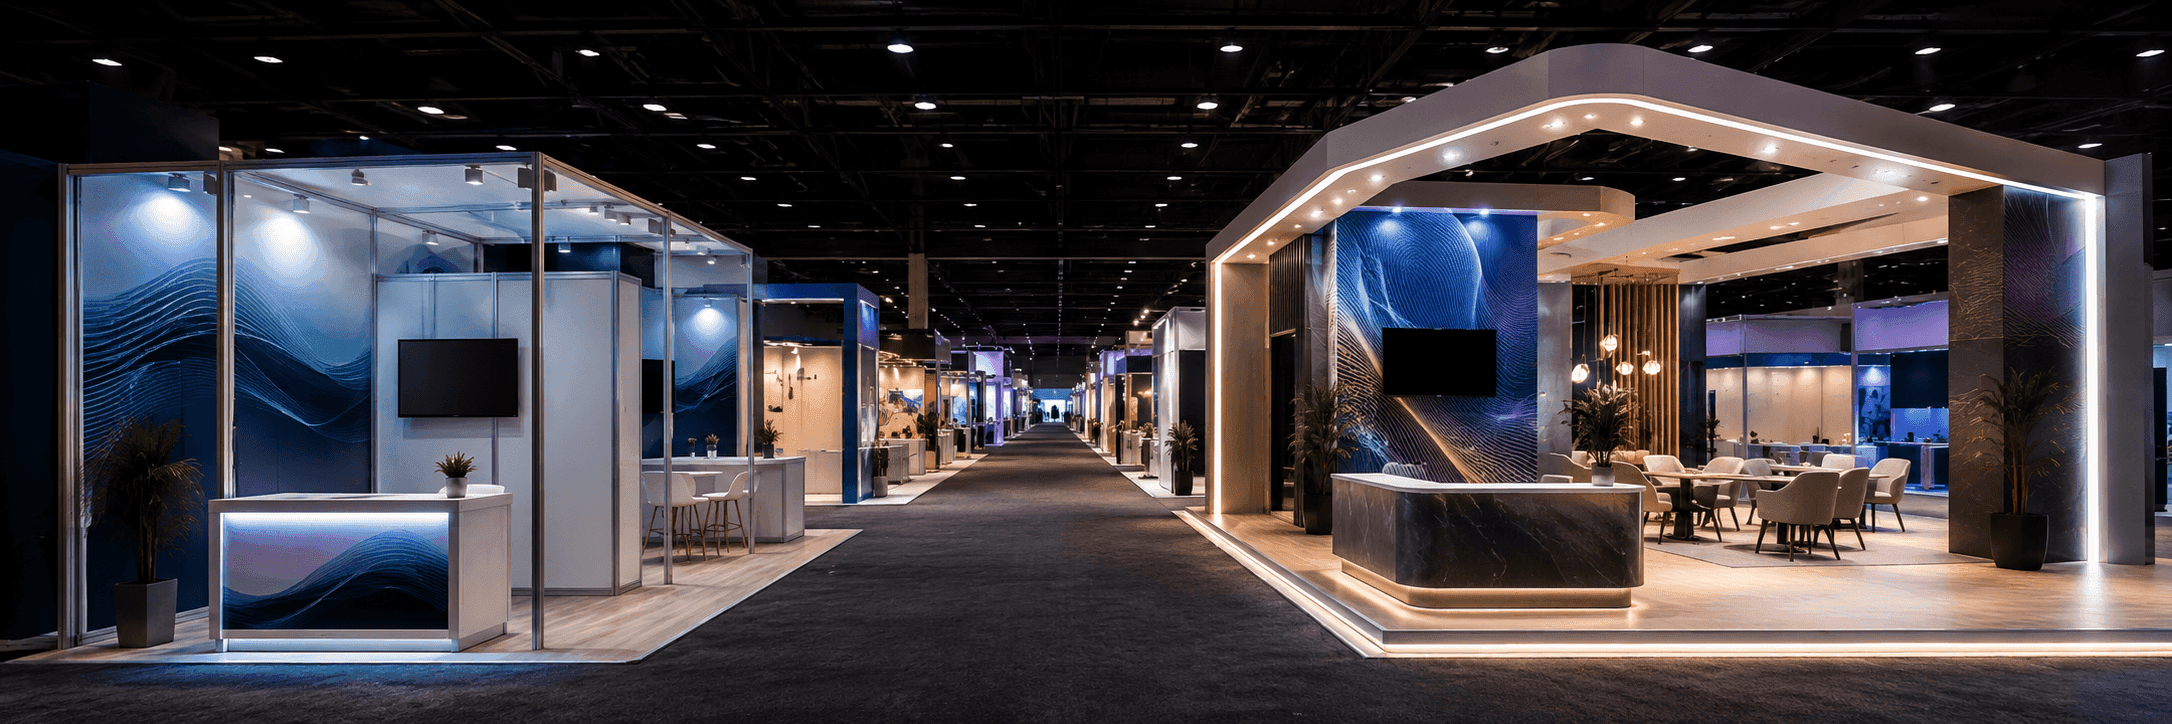
What a 20x20 Booth Rental Should Do
A 20x20 booth rental gives exhibitors enough space to create a real brand presence without moving into a large island booth. For many Las Vegas trade shows, this size can support product demos, reception space, graphic walls, storage, and quick conversations with buyers.
The key is not to fill the booth with too many counters or furniture pieces. A strong 20x20 booth layout usually starts with one clear question: what should visitors understand in the first few seconds?
For booth size planning, use the 20x20 booth planning page as the main reference. This article focuses on how a 20x20 rental booth should be planned around layout, graphics, demos, and show-site setup.

A 20x20 booth rental layout should separate demo space, meeting areas, graphics, storage, and staff movement so visitors can understand the booth quickly from the aisle.
When a 20x20 Rental Booth Makes Sense
A 20x20 trade show booth rental in Las Vegas works best when exhibitors need a booth that is visible, practical, and flexible. It is a good fit for companies that want a stronger presence than a 10x20 booth but do not need a fully custom large island build.
For many exhibitors, a Las Vegas trade show booth rental starts with choosing the right footprint. 20x20 booth rentals often work well when the booth needs one focused demo point, branded graphics, compact meeting space, storage, and controlled show-site setup.
Common use cases include:
Product demo booths
Technology product displays
Retail product showcases
Small meeting-focused exhibits
Modular booth rental layouts
Branded Las Vegas trade show booth rental projects
If the booth structure needs to stay flexible across multiple shows, review customizable trade show booth rental in Las Vegas as the rental planning reference.

Clear booth graphics help visitors understand the product before the demo starts, especially in a 20x20 rental booth where every wall, counter, and sign needs a clear role.
20x20 Booth Layout Planning
A 20x20 booth is easier to manage when each area has a clear purpose. The layout should support traffic from the aisle, give staff room to work, and keep the main message easy to see.
Booth Area | Purpose | Planning Note |
|---|---|---|
Greeting Area | Welcomes visitors from the aisle | Keep it open and easy to enter |
Demo Counter | Supports product explanation | Avoid blocking the main traffic path |
Meeting Space | Handles short buyer conversations | Use compact seating or standing tables |
Graphics Wall | Communicates brand and product value | Keep the message readable from the aisle |
Storage | Holds samples, bags, or staff items | Keep it hidden but accessible |
Staff Pathway | Helps the team move inside the booth | Do not overcrowd the center |
A 20x20 booth rental should feel open enough for visitors to step in, pause, and understand the offer. If the booth needs multiple demo stations or more private meeting space, compare it with 20x30 booth planning before finalizing the size.
Graphics and Product Messaging
Graphics matter in a 20x20 booth because visitors often decide whether to stop before they speak to your team. A clean backwall, readable product message, and well-placed counter graphics can make the booth easier to understand from the aisle.
Good 20x20 booth graphics should answer three things quickly:
Who is the company?
What product or service is being shown?
Why should a visitor stop?
For booths that depend on product visuals, demos, or branded surfaces, graphics and brand presentation support can help align backwalls, signage, counters, and demo visuals with the booth layout.

A 20x20 booth rental works best when layout, graphics, storage, lighting, electrical needs, and installation timing are confirmed before show-site setup begins.
20x20 Booth Rental Checklist
Before approving a 20x20 trade show booth rental, exhibitors should confirm both the booth design and the show-site details.
Item | What to Confirm |
Booth Orientation | Which sides open to aisle traffic |
Demo Needs | Product size, screen placement, power, and counter height |
Graphics | Backwall, SEG panels, counter graphics, or lightbox graphics |
Meeting Area | Standing conversations or seated meetings |
Storage | Samples, bags, literature, and staff items |
Flooring | Carpet, vinyl, raised flooring, or branded flooring |
Lighting | General lighting, product lighting, or graphic lighting |
Electrical | Outlets, monitors, demo equipment, and charging needs |
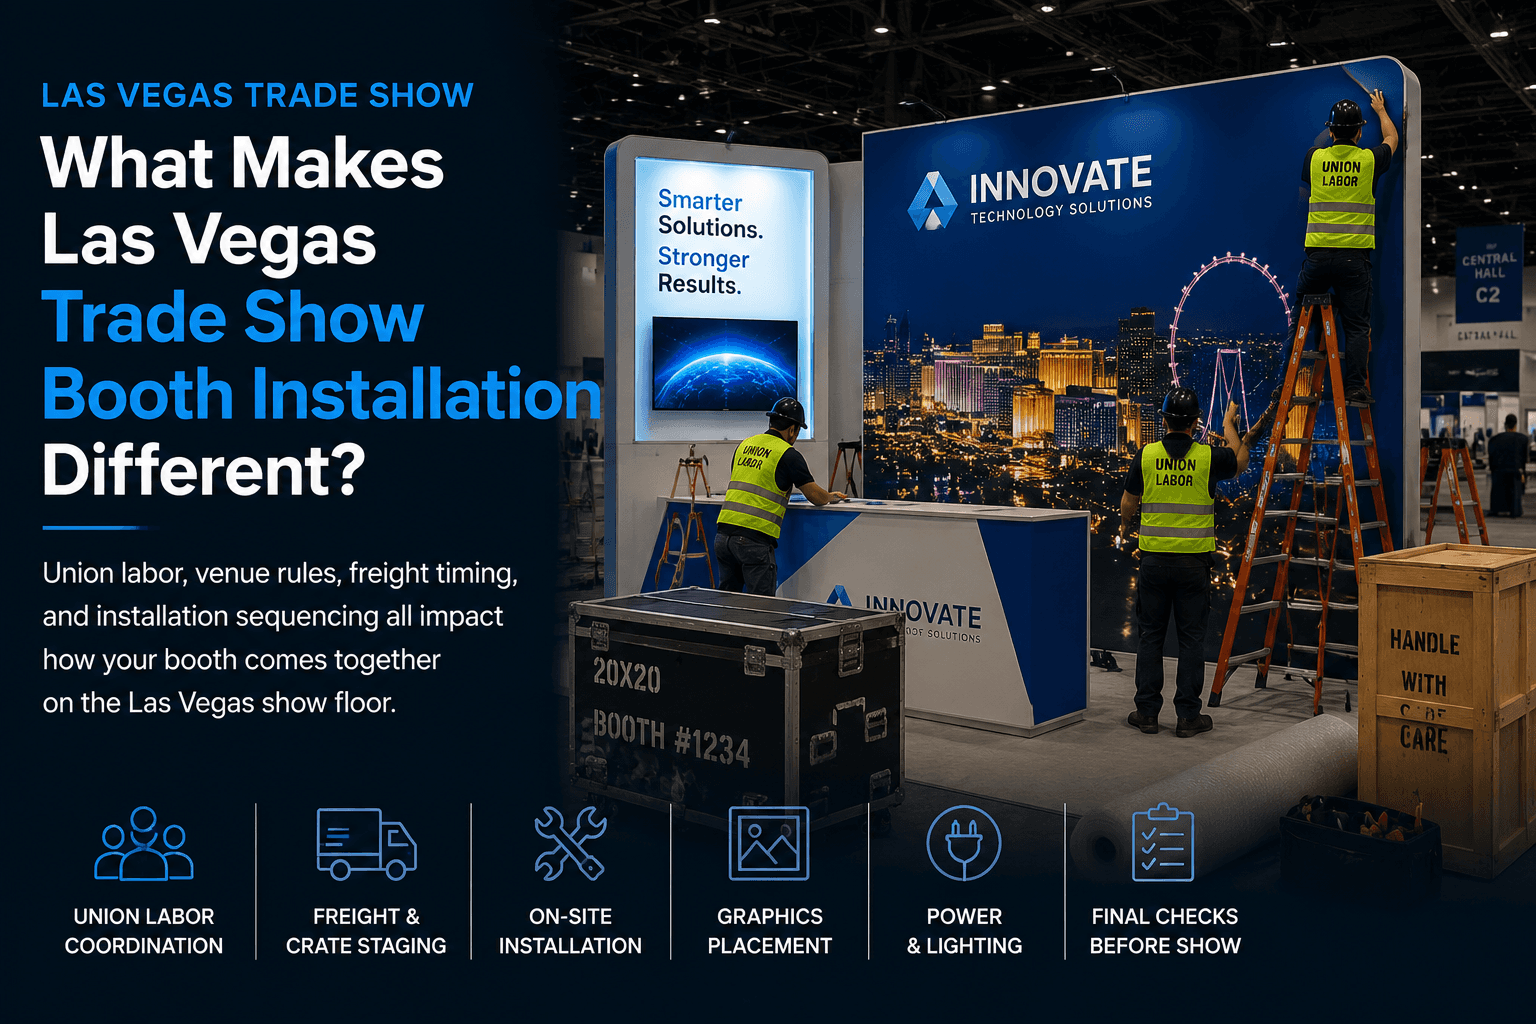
Installation | Move-in schedule, labor timing, and final setup sequence |
Venue Rules | Height limits, freight, drayage, and show manual requirements |
The booth will be easier to manage when layout, graphics, rental structure, and installation timing are planned together.
What Is Usually Included in a 20x20 Booth Rental?
A 20x20 booth rental may include the main booth structure, printed graphics, counters, shelving, flooring, lighting, storage, and installation support. The exact scope depends on the booth provider, event rules, venue requirements, and production timeline.
Before production, exhibitors should confirm:
Are graphics included or quoted separately?
Are counters, shelves, monitors, and furniture included?
Is installation and dismantle included?
Are freight, drayage, and material handling separate?
Can the rental booth be reused or adapted for another show?
Can graphics be updated for a future event?
These details should be confirmed early, especially for Las Vegas shows with tight move-in windows and service deadlines.
Related Planning Links
For exhibitors planning a similar booth, these pages connect the topic with booth size, rental structure, graphics, and layout planning:
20x20 booth planning — main size page for 20x20 booth layout, demo space, storage, graphics, and meeting areas.
customizable trade show booth rental in Las Vegas — rental planning page for exhibitors comparing flexible booth structures.
graphics and brand presentation support — service page for backwalls, signage, product visuals, and branded booth surfaces.
20x30 booth planning — useful comparison page when a 20x20 booth may not provide enough demo or meeting space.
FAQ
Is a 20x20 booth large enough for product demos?
Yes. A 20x20 booth can support product demos, branded graphics, storage, and short meetings when the layout leaves enough open space for visitors and staff movement.
Are 20x20 booth rentals enough for Las Vegas trade shows?
Yes. 20x20 booth rentals can work well for Las Vegas trade shows when the layout supports one clear demo area, readable graphics, compact meeting space, storage, and easy visitor entry from the aisle.
What is usually included in a 20x20 trade show booth rental?
A 20x20 booth rental may include the booth structure, graphics, counters, lighting, flooring, storage, and installation support. Exhibitors should confirm the exact rental scope before production.
How should a 20x20 booth rental be laid out?
A strong 20x20 layout usually separates the booth into greeting, demo, meeting, storage, staff movement, and graphics areas. The booth should stay open enough for visitors to enter easily.
Is a 20x20 booth rental better than a custom build?
A 20x20 booth rental is often better for exhibitors who need flexibility, faster planning, reusable structure, and controlled production scope. A custom build may be better for unique architecture or heavy product integration.
When should exhibitors start planning a 20x20 booth rental in Las Vegas?
Exhibitors should start early enough to confirm layout, graphics, electrical needs, venue rules, freight timing, and installation schedule before production begins.
Final Takeaway
A 20x20 trade show booth rental can work well for Las Vegas exhibitors when the booth is planned around clear layout zones, readable graphics, product demos, storage, and show-site setup. The best result comes from choosing the booth size first, then aligning rental structure, graphics, and installation details around that plan.